How-To Add a Photo in CardExchange® Controller
The Controller offers extensive functionality to take photos with the use of a webcam or by uploading a file. The picture taken will also have to be approved in the Photo Management Center to enhance security.
In this article, you will learn the basics of adding a photo in CardExchange® Controller and how you can use them to organize photos' history.
It starts by clicking on a person’s profile. You can add the photo either by clicking on “Upload” to upload a file from your computer or click on “Capture” to use a connected webcam.

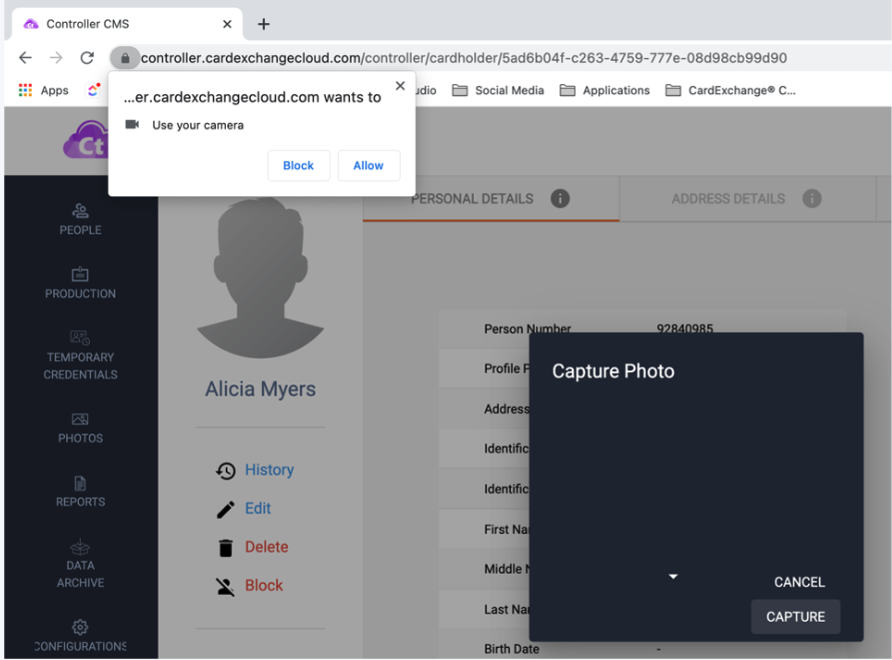
When you click on “Capture”, the Capture Photo window will pop up, and depending on which browser you use, you will have the option to Allow or Block the camera. Click on “Allow” to start activating the webcam. When the webcam is selected and active, it will show a live preview of the person. Click on “Capture” to open the Edit Photo window, and depending on if face recognition functionality is enabled, it will show a crop box in the ratio as defined in the Admin Center.

When you click on “Save” and the photo compare functionality is enabled, and there is already a history of photos available, the Face Comparison window will open and try to match the new photo with the current photos on file. Depending on the outcome, you can always save the photo by clicking on the “Save” button. When photo approval is enabled, the photo will be sent to the Photo Management Center to be approved for issuance, if not, the photo will appear on the Person page.
Uploading a photo is basically the same process. Click on “Upload” and select the photo file to import.

To see the history of the available photos, click on “History” at the left bottom of the person photo and the Photo History window will open.

The photos shown are always approved photos, but it can be that they are not valid anymore considering the set business rules. A defined business rule can be that a photo is not allowed to be older than 6 or 12 months from the date of first approval. Also be aware that when photo approval is enabled, a captured photo or uploaded photo will not be shown until approved. Note that the user will not be able to reupload a new photo via the mobile app or website until the first photo is approved or rejected.
Go ahead and give it a go!


